Xcode + Cargo
To demonstrate how to set up an Xcode + Cargo project, we'll create a new iOS application that makes use of swift-bridge in order
use rust-analyzer to perform syntax highlighting of Rust code.
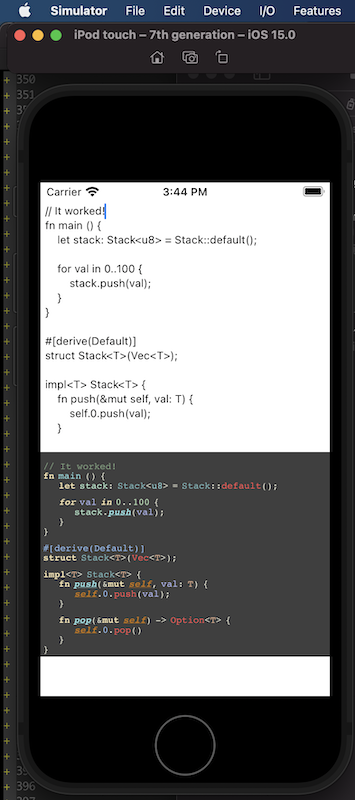
When we're done we'll have a simple application where we can type Rust code into a text area and see the syntax highlighted version below it.
Project Setup
Create a new project.
cargo new --lib ios-rust-analyzer
cd ios-rust-analyzer
Install cargo-lipo.
cargo install -f cargo-lipo
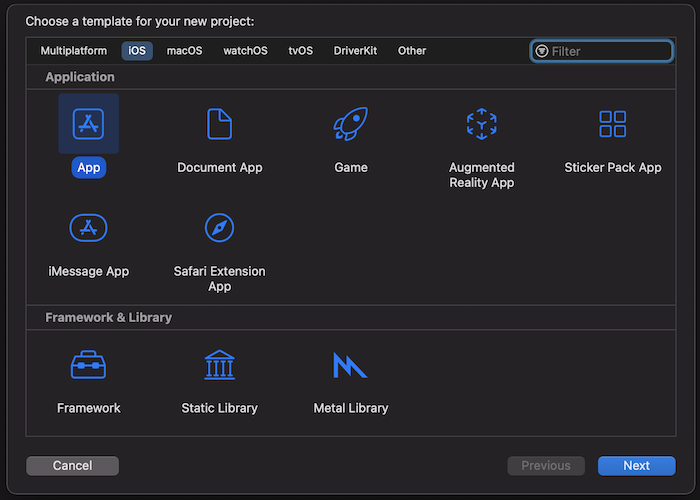
Create a new Xcode project within the ios-rust-analyzer directory.
Xxode > File > New Project > iOS > App
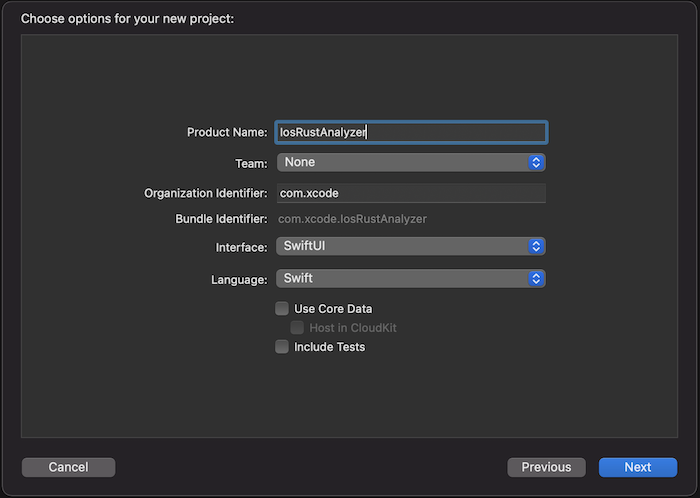
We'll name it IosRustAnalyzer.
Your directory should now look something like:
$ tree -L 2
.
├── Cargo.toml
├── IosRustAnalyzer
│   ├── IosRustAnalyzer
│   └── IosRustAnalyzer.xcodeproj
└── src
    └── lib.rs
Create a bash script that we can use to build the application
touch IosRustAnalyzer/build-rust.sh
chmod +x IosRustAnalyzer/build-rust.sh
#!/bin/bash

##################################################
# We call this from an Xcode run script.
##################################################

set -e

if [[ -z "$PROJECT_DIR" ]]; then
    echo "Must provide PROJECT_DIR environment variable set to the Xcode project directory." 1>&2
    exit 1
fi

cd $PROJECT_DIR

export PATH="$HOME/.cargo/bin:$PATH"

# Without this we can't compile on MacOS Big Sur
# https://github.com/TimNN/cargo-lipo/issues/41#issuecomment-774793892
if [[ -n "${DEVELOPER_SDK_DIR:-}" ]]; then
  export LIBRARY_PATH="${DEVELOPER_SDK_DIR}/MacOSX.sdk/usr/lib:${LIBRARY_PATH:-}"
fi

TARGETS=""
if [[ "$PLATFORM_NAME" = "iphonesimulator" ]]; then
    TARGETS="aarch64-apple-ios-sim,x86_64-apple-ios"
else
    TARGETS="aarch64-apple-ios,x86_64-apple-ios"
fi

# if [ $ENABLE_PREVIEWS == "NO" ]; then

  if [[ $CONFIGURATION == "Release" ]]; then
      echo "BUIlDING FOR RELEASE ($TARGETS)"

      cargo lipo --release --manifest-path ../Cargo.toml  --targets $TARGETS
  else
      echo "BUIlDING FOR DEBUG ($TARGETS)"

      cargo lipo --manifest-path ../Cargo.toml  --targets $TARGETS
  fi

# else
#   echo "Skipping the script because of preview mode"
# fi
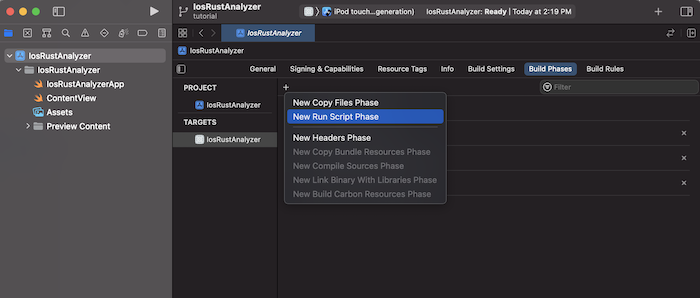
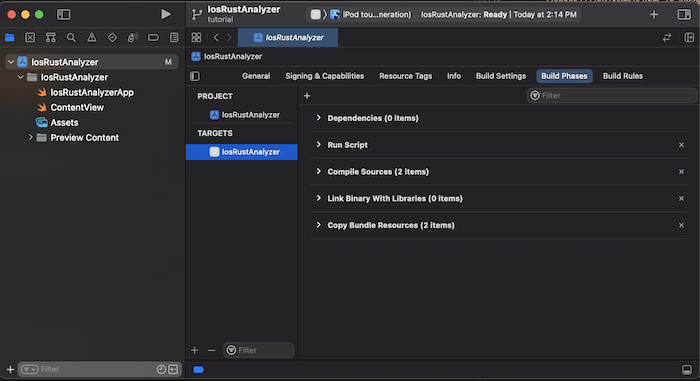
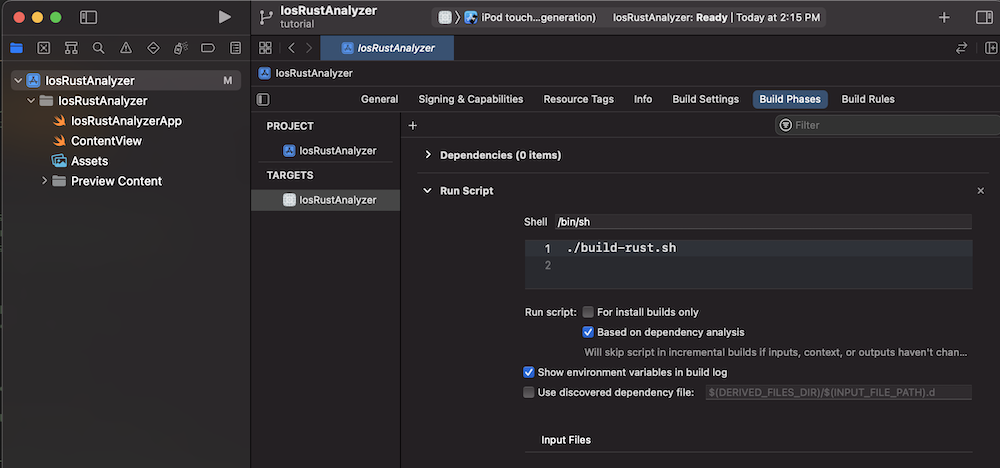
Create a new build phase that calls ./build-rust.sh — the bash script that we created.
Be sure to drag it before the Compile Sources step.
Create a directory Generated where our generated Swift and C code will go.
mkdir IosRustAnalyzer/Generated
touch IosRustAnalyzer/Generated/.gitignore
Give IosRustAnalyzer/Generated/.gitignore the following contents:
# IosRustAnalyzer/Generated/.gitignore
*
!.gitignore
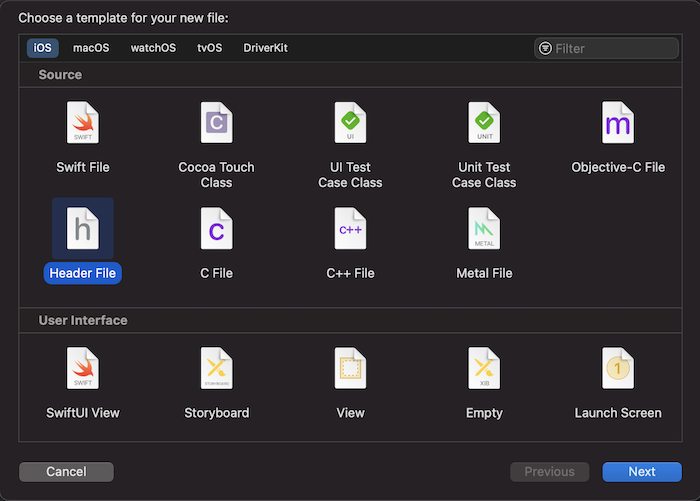
Create a new bridging header and name it BridgingHeader.h.
Give it these contents:
#ifndef BridgingHeader_h
#define BridgingHeader_h

#include "Generated/SwiftBridgeCore.h"
#include "Generated/ios-rust-analyzer/ios-rust-analyzer.h"

#endif
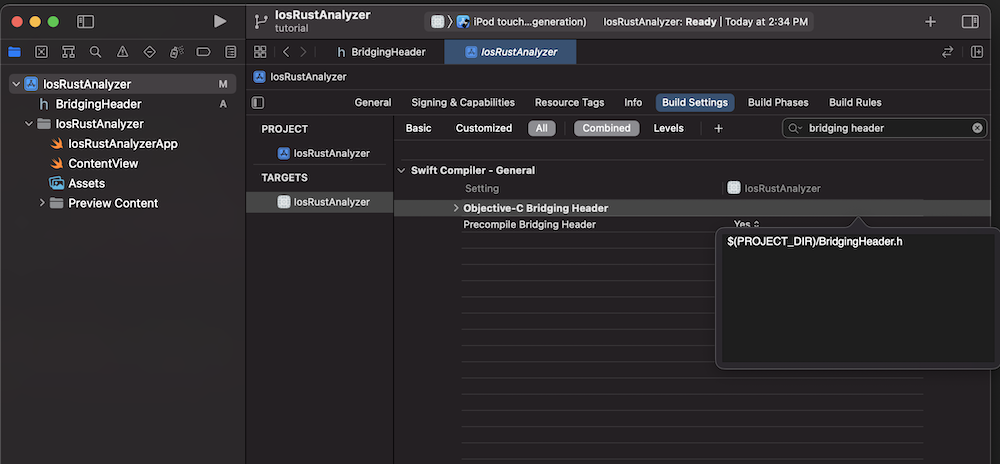
Set the bridging header to $(PROJECT_DIR)/BridgingHeader.h
In the Cargo.toml, set the crate-type and build script.
[package]
name = "ios-rust-analyzer"
version = "0.1.0"
edition = "2021"

build = "build.rs"

[build-dependencies]
swift-bridge-build = "0.1"

[lib]
crate-type = ["staticlib"]

[dependencies]
swift-bridge = "0.1"
ide = {git = "https://github.com/rust-analyzer/rust-analyzer"}
Create our build script.
touch build.rs
// In build.rs

fn main() {
  // TODO...
}
Build the Cargo project once so that we can generate the files that we'll be linking to.
PROJECT_DIR="${PWD}/IosRustAnalyzer" ./IosRustAnalyzer/build-rust.sh
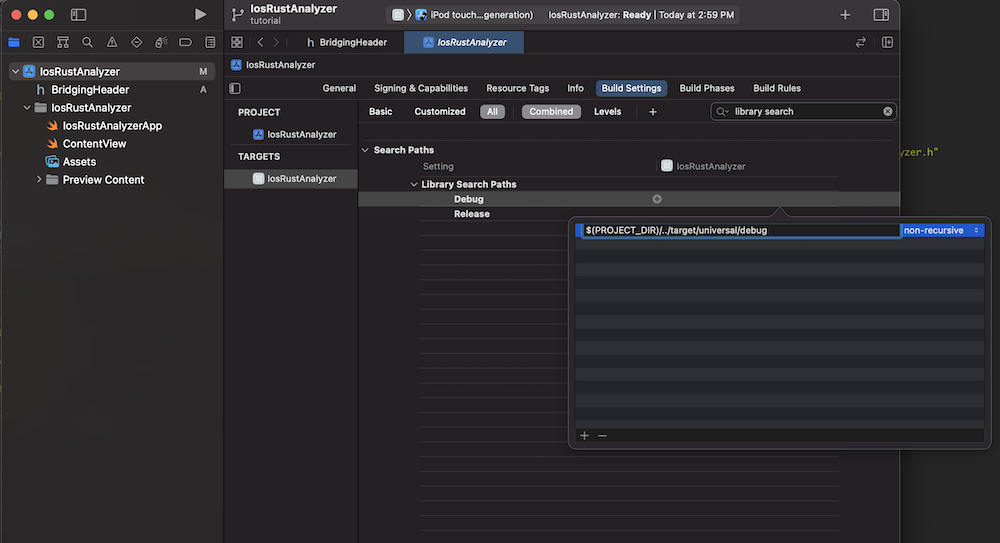
Set the Debug library search path to $(PROJECT_DIR)/../target/universal/debug, and the Release library
search path to $(PROJECT_DIR)/../target/universal/release
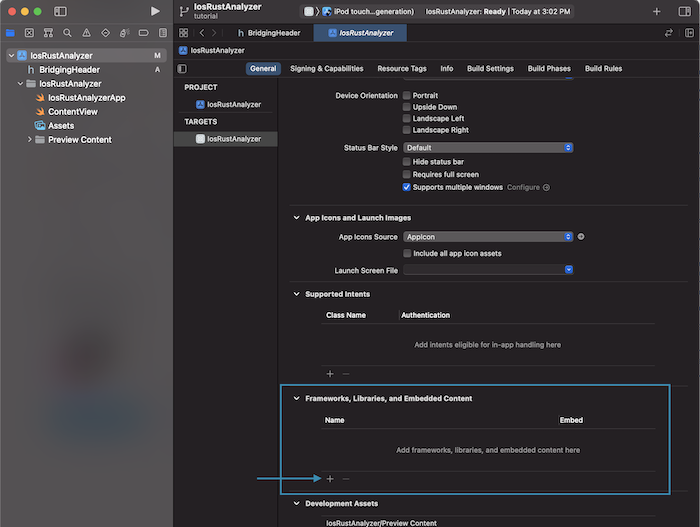
Go to IosRustAnalyzer > General > Frameworks, Libraries, and Embedded Content > + to add and click Add Other > Add Files.
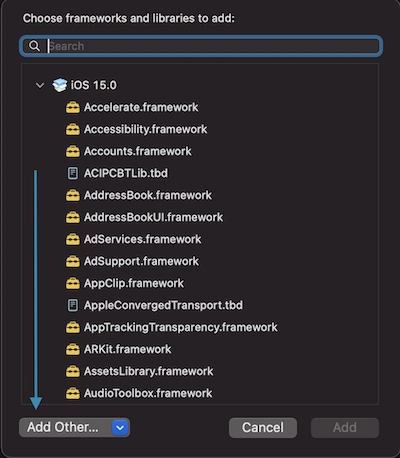
Select the target/universal/debug/libios_rust_analyzer.a file.
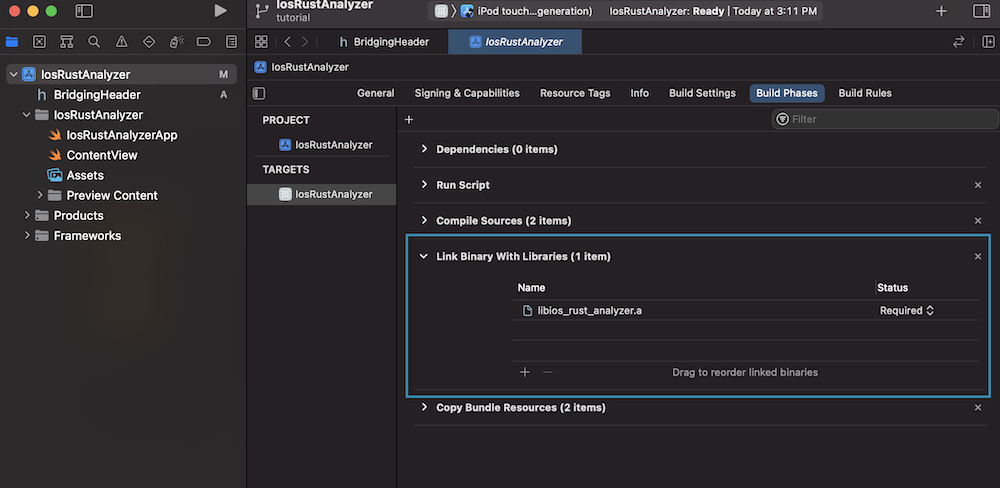
Select the same target/universal/debug/libios_rust_analyzer.a in the link binaries with libraries build phase.
Add the following to the build.rs file that we created earlier.
const XCODE_CONFIGURATION_ENV: &'static str = "CONFIGURATION";

fn main() {
    let out_dir = "IosRustAnalyzer/Generated";

    let bridges = vec!["src/lib.rs"];
    for path in &bridges {
        println!("cargo:rerun-if-changed={}", path);
    }
    println!("cargo:rerun-if-env-changed={}", XCODE_CONFIGURATION_ENV);

    swift_bridge_build::parse_bridges(bridges)
        .write_all_concatenated(out_dir, env!("CARGO_PKG_NAME"));
}
Build again so that we can genrate the files that we're including from BridgingHeader.h.
PROJECT_DIR="${PWD}/IosRustAnalyzer" ./IosRustAnalyzer/build-rust.sh
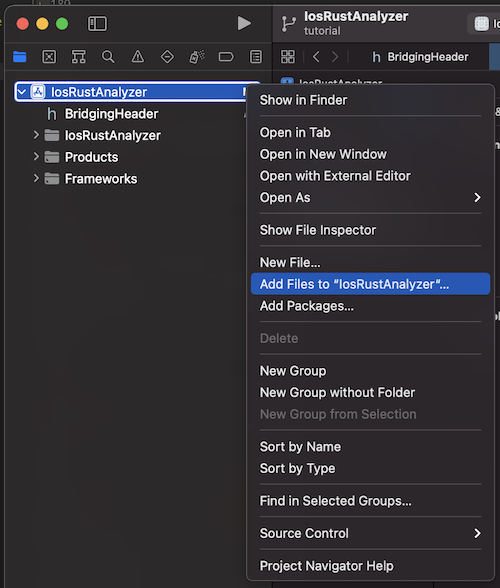
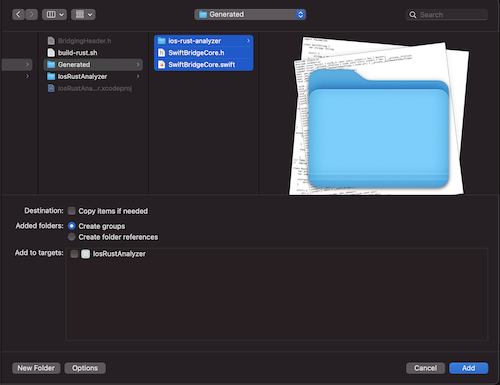
Right click on IosRustAnalyzer and click Add Files To IosRustAnalyzer. Add the entire Generated directory.
Pressing the Run button should now open up the iOS simulator with Xcode's default "Hello World" iOS app.

Rust
Now that we've set up our project, it's time to write some code!
Add the following to src/lib.rs.
#![allow(unused)]
fn main() {
#[swift_bridge::bridge]
mod ffi {
    extern "Rust" {
        type RustApp;

        #[swift_bridge(init)]
        fn new() -> RustApp;

        fn generate_html(&self, rust_code: &str) -> String;
    }
}

pub struct RustApp {}

impl RustApp {
    fn new() -> Self {
        RustApp {}
    }

    fn generate_html(&self, rust_code: &str) -> String {
        let (analysis, file_id) = ide::Analysis::from_single_file(rust_code.to_string());

        analysis
            .highlight_as_html(file_id, true)
            .unwrap_or("Error".to_string())
    }
}
}
Swift
Add the following to IosRustAnalyzerApp.swift
import SwiftUI

@main
struct IosRustAnalyzerApp: App {
    var body: some Scene {
        WindowGroup {
            ContentView()
                .environmentObject(RustAppWrapper(rust: RustApp()))
        }
    }
}

class RustAppWrapper: ObservableObject {
    var rust: RustApp

    init (rust: RustApp) {
        self.rust = rust
    }
}
Add the following to ContentView.swift
import SwiftUI
import WebKit
import Combine

struct ContentView: View {
    @EnvironmentObject var rustApp: RustAppWrapper

    @State private var rustSource = initialSource
    @State private var rustHtml = ""

    var body: some View {
        VStack {
            TextEditor(text: $rustSource)
                .font(.caption)
                .onReceive(Just(rustSource), perform: {sourceCode in
                    let html = rustApp.rust.generate_html(sourceCode).toString()
                    rustHtml = html
                })

            WebView(text: $rustHtml)
                .frame(minWidth: 0, maxWidth: .infinity, minHeight: 0, maxHeight: .infinity)

        }
    }
}

struct WebView: UIViewRepresentable {
    @Binding var text: String

    func makeUIView(context: Context) -> WKWebView {
        return WKWebView()
    }

    func updateUIView(_ uiView: WKWebView, context: Context) {
        uiView.loadHTMLString(text, baseURL: nil)
    }
}

let initialSource = """

fn main () {
    let stack: Stack<u8> = Stack::default();

    for val in 0..100 {
        stack.push(val);
    }
}

#[derive(Default)]
struct Stack<T>(Vec<T>);

impl<T> Stack<T> {
    fn push(&mut self, val: T) {
        self.0.push(val);
    }

    fn pop(&mut self) -> Option<T> {
        self.0.pop()
    }
}

"""


struct ContentView_Previews: PreviewProvider {
    static var previews: some View {
        ContentView()
            .environmentObject(RustAppWrapper(rust: RustApp()))
    }
}
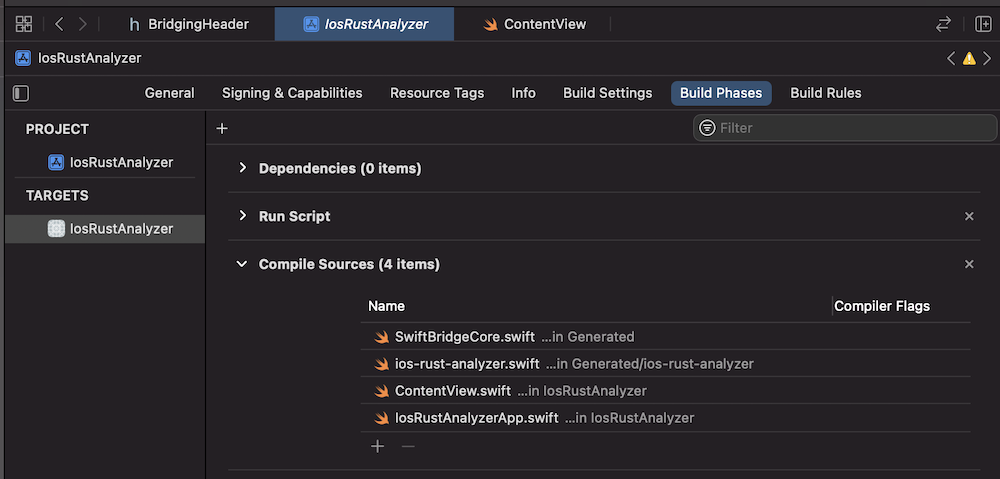
Make sure that you see 4 files in your Compile Sources build phase.
Runing the application in the iPhone simulator using Cmd + R should show a working demo!